
How to send nanocosmos streams with OBS, Wirecast, vMix
This is a quick, side-by-side config reference for sending an ultra-low-latency live stream to the nanocosmos platform from OBS, Wirecast, or vMix. New to OBS? See our full OBS low-latency guide for background and troubleshooting — this page is the fast reference once you know which encoder you’re using.
For a complete web-based broadcasting solution, check out our nanoStream Webcaster: Demo Overview & Webcaster Documentation.
Table of contents
Note: the nanocosmos platform also works with other software and hardware encoders like JVC camera, Videon, and Teradek. Check our Tips & Tutorials for more encoding guides and recommendations.
OBS Studio
Automatic Configuration
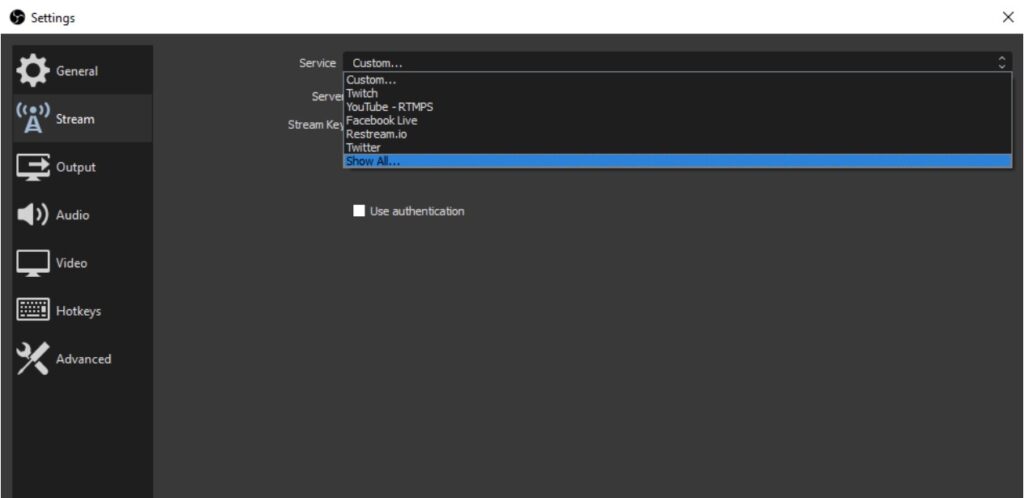
1) Navigate to Settings-> Stream-> Service
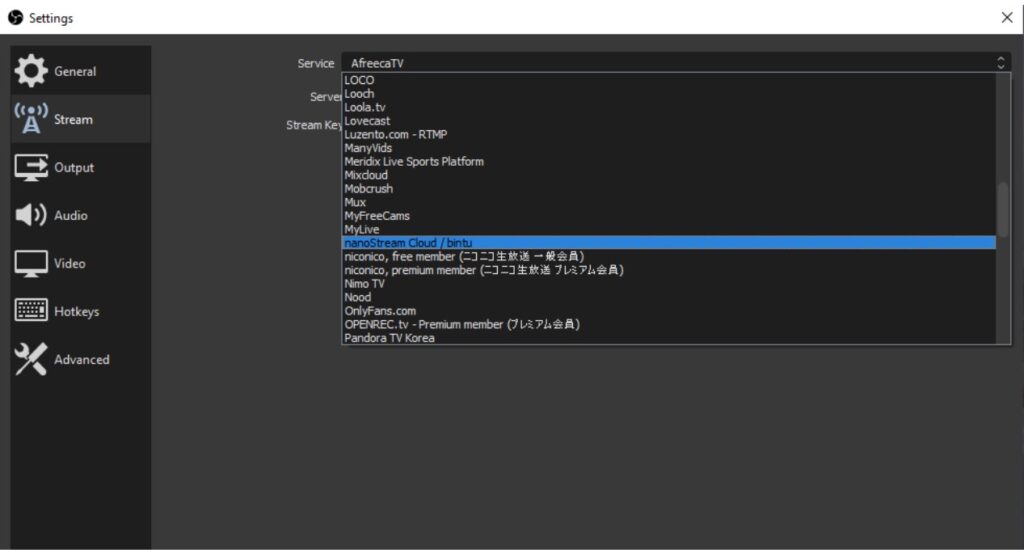
2) Select Other-> nanoStream Cloud
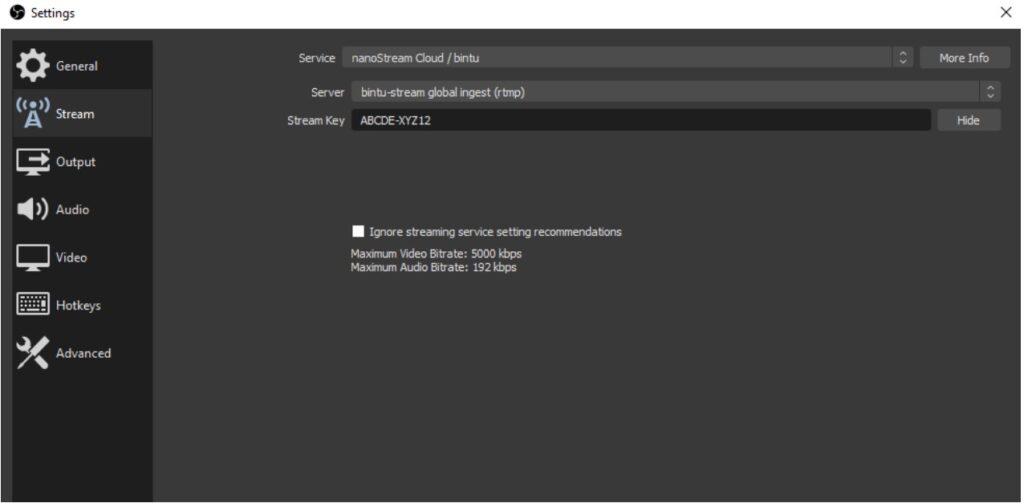
3) Enter your stream name in the stream key field
i.e. ABCDE-XYZ12
Manual configuration
1) Select Settings-> Stream-> Service-> Custom
2) Enter your RTMP Ingest URL as the Server
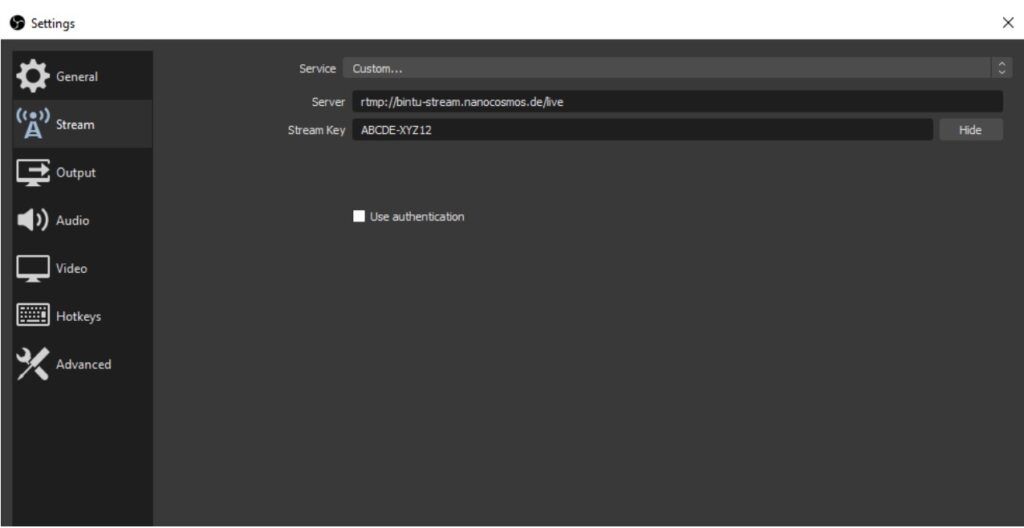
3) Enter your stream name in the stream key field.
e.g ABCDE-XYZ12
Video configuration
1) Select Output, and enter the following:
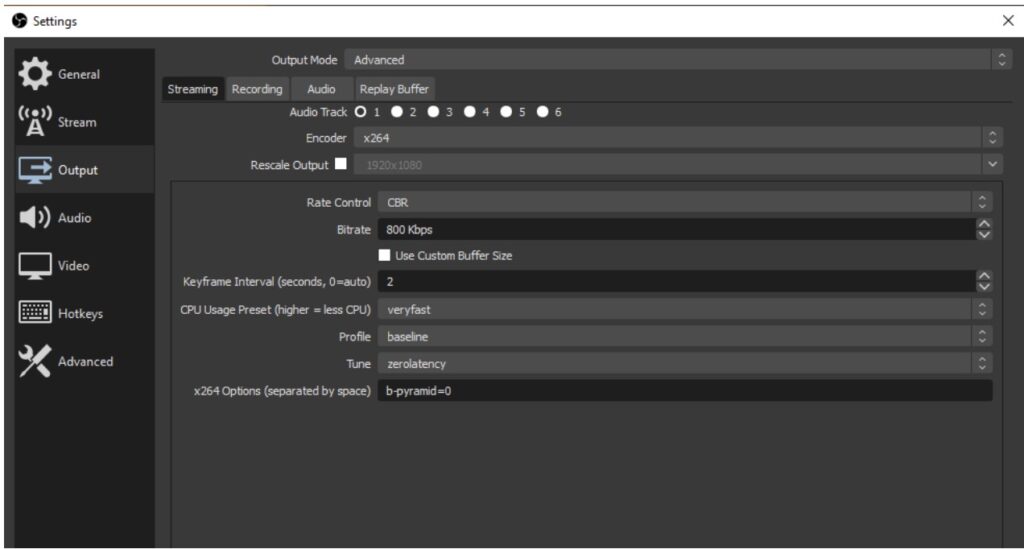
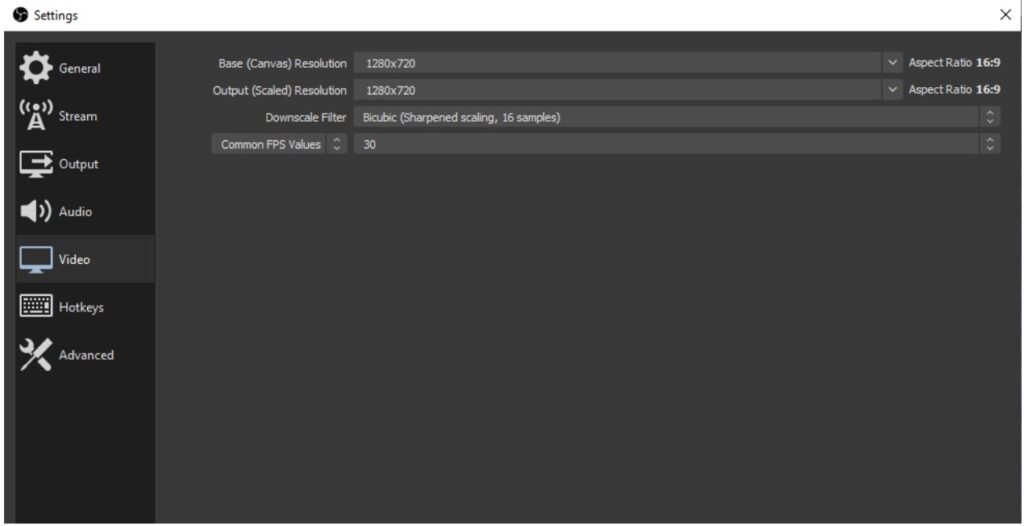
Output Mode: Advanced
Encoder: x264
Rate Control: CBR
Bitrate: 500-4000 kBits/s
Tune: ZeroLatency
CPU Usage: veryfas # optional
Profile: Baseline # optional
x264 Options: B-Pyramid=0 # optinal
Live stream quality
Video quality is primarily decided by,
- Video resolution and bitrate of the encoder configuration
- CPU and system performance of your camera and PC / Laptop
- Network capacity
All factors have an impact on quality. If you try to turn bitrate and resolution very high, but your system
and the whole network does not support it, you will get bad results.
Wirecast
Configuration
1) Open Output Settings
2) Select Destination: RTMP Server
3) Enter RTMP Ingest URL into the Address field.
4) Enter Stream Name into the stream field.
5) Select Encoding
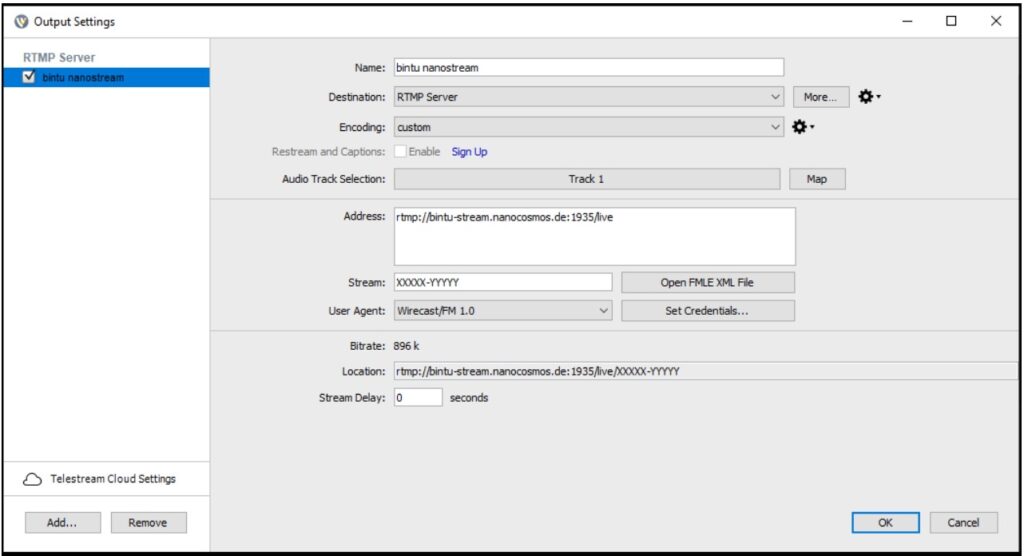
6) Select a profile preferable x264 i.e. 720p30 1.25 Mbps (x264 H264)
NOTE: for `x264` based profiles there is a Wirecast bug, you need to disable `b-frames`, see below
Wirecast x264 workaround
a) Select **Encoding profile:** Baseline
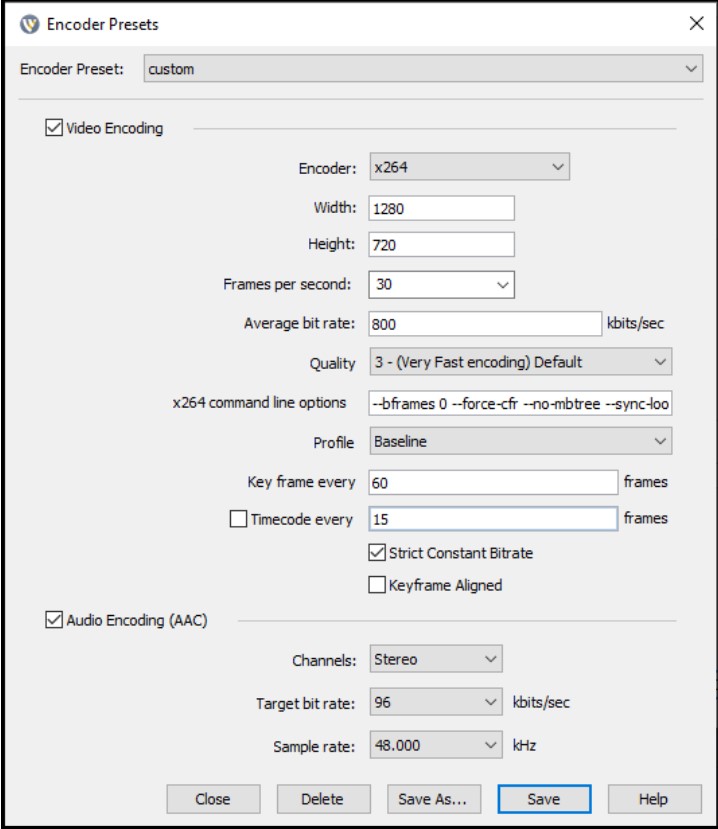
b) Select **Encoding profile:** Main – Add the option –bframes 0 wirecast enocding profile
NOTE: To achieve ultra low latency streaming, set the options below:
–bframes 0 –force-cfr –no-mbtree –sync-lookahead 0 –sliced-threads –rc-lookahead 0
vMix
Configuration
1) Open Configure Streaming Settings
2) Select Destination / Custom RTMP Server
3) Enter RTMP Ingest URL into URL field.
4) Enter Stream Name into the Stream Name or Key field.
5) Select a Quality profile, i.e. h264 720p 800kbps AAC 96kbps
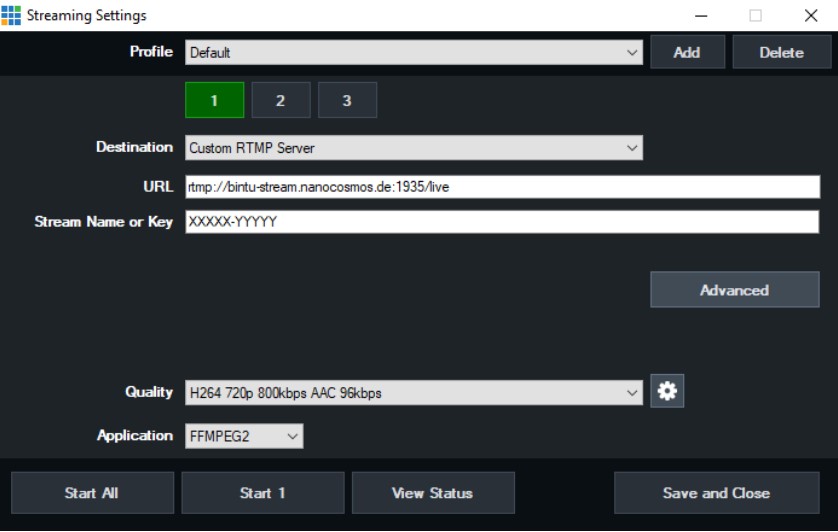
6) Select FFMPEG2 for Application vmix streaming settings
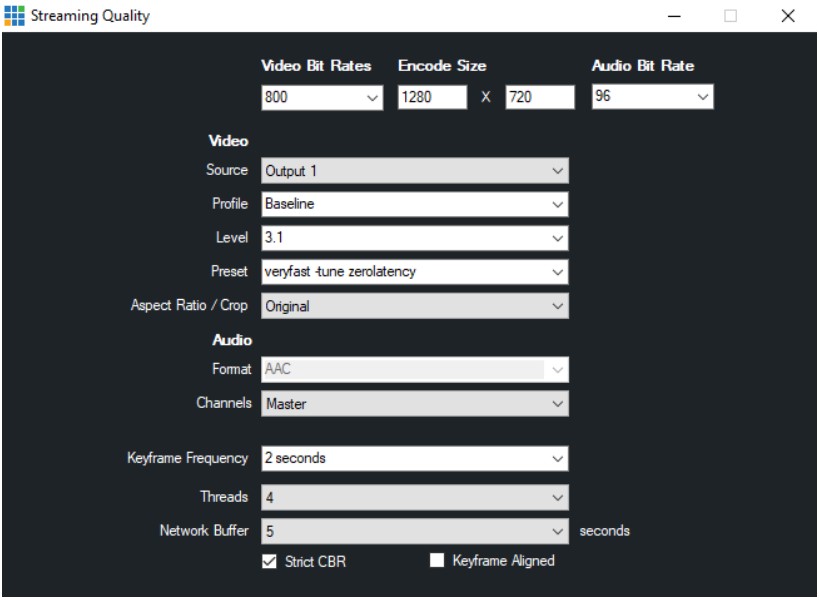
vmix streaming quality settings
vMix low latency
- Profile: Baseline
- Preset: veryfast
- Network Buffer: 5
vMix ultra-low latency
Preset: veryfast -tune zerolatency
WARNING: This is a hack for sending tuning parameters to x264 and may not work if vMix does some changes in an update.
General recommendations
- Start with the lowest acceptable quality, like medium resolution and bitrate, like 640×480 1000 kBits/s or 1280×720 2000 kBits/s.
- Test the whole setup end-to-end, including playback on several devices.